If you’re shooting 4K or 8K, your phone’s internal storage fills up quickly. A few minutes of video from something like the Galaxy S26 Ultra – especially with the new APV format – can eat up several gigabytes before you even have a chance to review the clip.
Galaxy phones have a fix for this that most people don’t know about: you can record video directly to a USB-C drive while filming, bypassing internal storage entirely. The feature works with every video format that the Camera app supports, including APV.
This is not a microSD card. The Camera app saves images directly to whatever is connected to your USB-C port – flash drive, portable SSD, Samsung T-series drives, etc. – while you’re recording. The phone never stores in it before.
What you need to use this tool
Not every Galaxy model supports this. It is generally available on newer devices running One UI 7.0 and up.
For storage, a flash drive will technically work, but a portable SSD is a better line. Video recording puts a constant strain on writing speed, and it’s difficult to drive slowly (more on that below). The cable or adapter you use is also important; A weak link in the recording medium is asking for trouble.
Why record directly to external storage
The obvious reason: you can stop worrying about storage space. Shoot an event, a long conversation, or a day of travel without pausing to delete old files.
It also makes it easier to work with your files. When you’re done, pull the drive out and plug it into your computer. No cable, no file transfer, no waiting, as the images are already there.
How to enable video recording to external storage
The steps to enable video recording to external storage vary depending on your version of One UI.
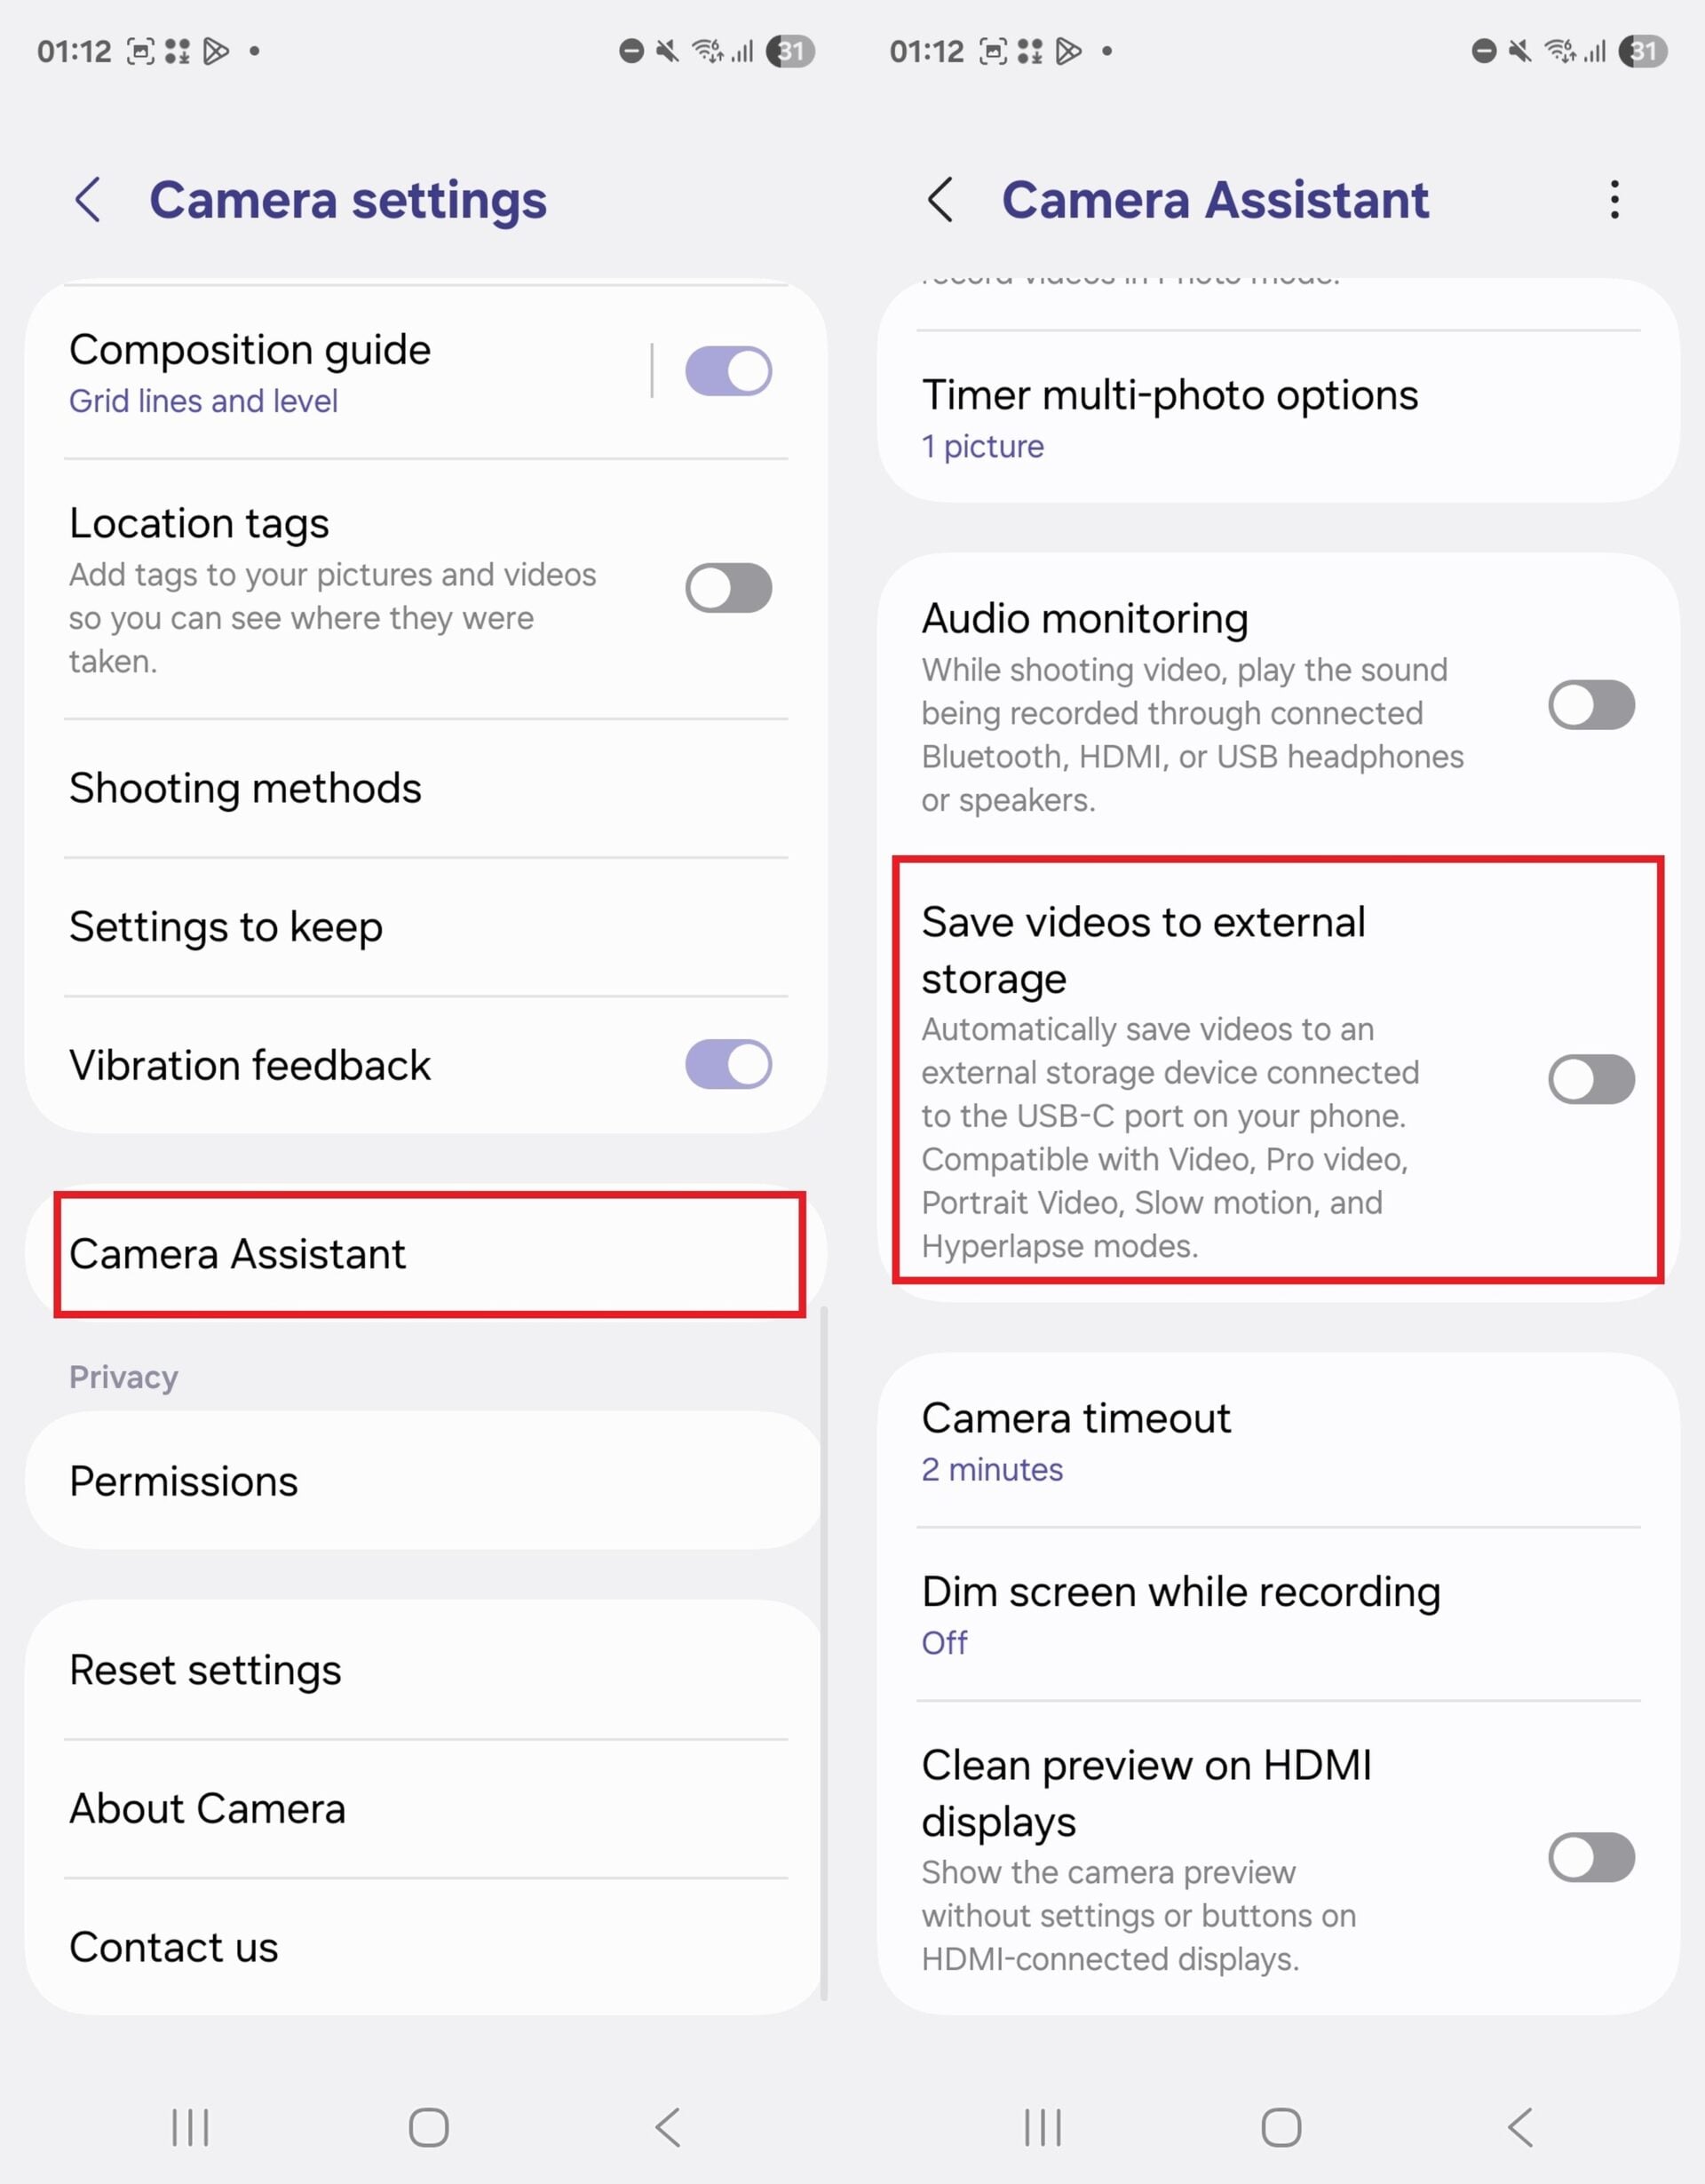
- Open the Camera app and go to its settings.
- Scroll down and tap on the Camera Assistant option. (This is a separate app and is available from the Camera app settings, and if it’s not installed on your device, you can download it from the Galaxy Store.)
- Help to Save videos to external storage choice.
Abhijeet Mishra/SamMobile
Steps to help save on external storage – Source: Abhijeet Mishra / SamMobile
- Open the Camera app and go to its settings.
- Under the Video section, enable the Save videos to external storage choice.
Once enabled, a USB-C icon appears in the upper right corner of the speaker while recording, along with a countdown of how much recording time is left on the drive. To find your records, go to My files > USB storage then open the DCIM folder.
Make sure your car is in good shape
The drive needs to be formatted as exFAT or FAT32but FAT32 will cause problems. It keeps the size of individual files to 4GB, which means that a long or high recording may fail to save or be divided into many parts.
If you format the drive directly on the phone, it changes to FAT32. For video, we recommend formatting it as exFAT on Windows PC otherwise there is no limit to the size of individual files.
Multi-part drives performed well in our testing as long as they were well made. Bootable drives – such as a Windows installation USB, which has many features – may not work at all.
Be sure to back up your data before formatting, as this will erase everything on the drive.
External storage speed is important
In our test, a standard flash drive introduced a noticeable delay after stopping recording. It takes a few seconds for the video to save, and the Camera app locks you out when it’s done recording. You can’t exit the home screen or switch apps until you’re done.
This is probably to prevent corrupted files, but it is confusing in practice. Driving fast will make a difference here. Portable SSDs reduce downtime and are faster when you want to open files for viewing or editing later.
One more thing you should know: if the drive disconnects the recording in the middle, the images cannot be recovered. In our testing, nothing is saved when that happens, so make sure the connection is secure before you start.
#record #videos #external #storage #Galaxy #smartphone